
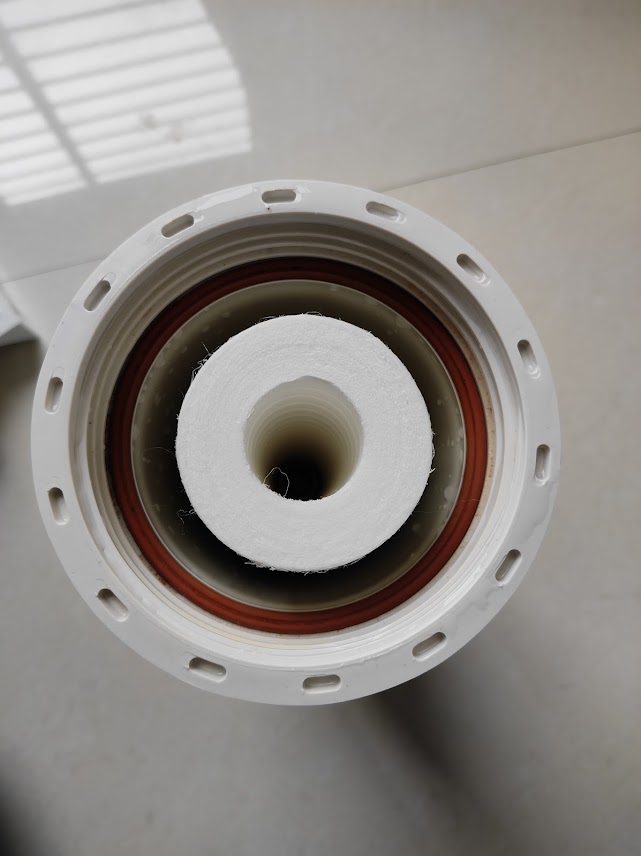
After months of constant use, the difference in water quality is striking when you open an untreated domestic or commercial Reverse Osmosis (RO) pre-filter bowl. The exterior surface of the exhausted cartridge, before it is replaced, is a solid white spun-polypropylene cylinder, while the new cartridge is a compacted cylinder of silt, rust, biological slime, and suspended particulate matter that is a dark-brown or jet-black color.
Moreover, inspection of the inner plastic bowl and head ports shows dark reddish-brown sludge that is coating the feed channel, central distribution spigot, and the wall of the housing. If you leave this assembly unattended, you can have a very important health tool become a microbial incubator and an engineering problem.
An RO Pre-Filter Cartridge is a filter that removes impurities from the water that enters the RO unit. (An Everyday Explanation)
Imagine that your RO water purification system is a high performance sports car:
The RO Membrane (The Engine): This is an ultra-dense microscopic membrane with pores that are as small as 0.0001 microns, which can block dissolved salts, heavy metals and viruses.
Table of Contents
Pre-Filter Cartridge (The Bumper & Air Filter):
Usually a 10 inch cylinder of melt-blown, thermally-bonded spun polypropylene (PP) filter with a 5 micron rating.
It is mainly used for sacrificial interception. The pre-filter physically removes sand, pipe scale, colloidal clay, silt and rust flakes; before the water ever reaches the expensive reverse osmosis membrane or carbon blocks, or the delicate booster pumps.
The Engineering Perspective: How Depth Filtration Works.
In a filtration engineering sense, a typical sediment cartridge is not simply a flat screen, but functions as a true-depth filter – a filter that uses a gradation of densities:
Fiber Gradient Structure: Outer perimeter is loosely wound, more porous capturing 20-50 µm debris, Inner core is tightly wound to stop particles down to 5 µm or 1 µm. This will eliminate immediate surface blinding and will spread the formation of particle cake throughout the cartridge radial cross-section.
The untreated water flows in through the outside casing of the housing bowl and enters the mandrel radially through the polypropylene fiber walls at the input line pressure (usually 1.5 to 3.5 bar) and is then drawn up through the hollow inner mandrel to the top center port.
Differential Pressure: In a pristine cartridge, the pressure drop across the filter is negligible (< 0.1/1.5 psi) As dirt, iron oxides, and organic colloids saturate the pore spaces, resistance spikes exponentially according to Darcy’s law of flow through porous media: Q = -(k/A) x (Pressure difference)/(length x viscosity)
What are the consequences of failing to care for pre-filters?
When a filter becomes saturated (black/brown color observed in field autopsies), it causes extreme engineering and biological failures:
A. Biological Hazard: Secondary Contamination & Biofilms
People often think a sediment filter is like a sterile barrier, but it’s not. Bacteria and protozoan cysts that are present in raw water settle directly into the trapped organic matrix.
Silt and decayed organic material creates a nutrient rich broth.
The Extracellular Polymeric Substances (EPS) are secreted by microorganisms to create an adhesive protective matrix that is a mature biofilm.
When a biofilm reaches a certain stage, the bacteria in the biofilm multiply inside the filter housing. The filter is exhausted and starts releasing bacteria, endotoxins and microbial metabolites downstream into the RO system, thus promoting biofouling on the sensitive polyamide membrane (Ahmed et al., 2023; Peña et al., 2013).
B. Engineering Strain: Cavitation & Pump Failure: If the pre-filter becomes extremely clogged, the domestic booster pump downstream would lose the necessary suction head (NPSH_A) from the pump would become less than what is required (NPSH_R).This suction starvation results in a fluid vaporization, mechanical vibration and wear of the pump impeller (cavitation).The hotter and longer the booster pump operates, the more electricity will be used and the shorter the life of the motor.
Cleaning of membranes by abrasion and scaling in the C. RO Membrane room
When the pressure difference in the pre-filter is too great, the rupture of the filter causes sharp and abrasive micro-particles to pierce downstream components, including the ultra-thin polyamide thin-film composite (TFC) membrane leaf. Findings from autopsy of failed RO units suggest that particulate and biological fouling are responsible for as much as 60% of all early membrane replacements (Peña et al., 2013).
Essential for any laboratory, this step-by-step protocol for sanitation and maintenance addresses the most fundamental aspects of the lab space.
This is only half the job when replacing the cartridge. Particulate sludge and bio-slime settle heavily along the lower bowl, O-ring seat and housing head, as observed in neglected units. When a fouled filter housing is removed and a new filter cartridge is inserted, the new filter is immediately contaminated.
Step-by-Step Housing Sanitation:
Isolate and Depressurize: Close main water feed valve and turn off the electricity to the RO unit. Drain internal pressure by turning on the faucet or push the pressure relief button on the housing head.
Take apart: Loosen the bowl by using an appropriate pre-filter spanner wrench to remove the bowl towards the counter-clockwise direction. With care, remove and dispose of the pre-wetted cartridge.
Physical Scrubbing:
Clean the inside and outside of the housing bowl and top manifold with warm water and dish soap or a food safe detergent.
Clean the recessed inlet channel, central spigot inlet and O-ring groove with a soft bristle bottle brush.
Disinfection Rinse:
Rinse housing with a food grade sanitizing solution, or a few drops of unscented chlorine bleach in water (Sanitizing solution: ~50 ppm free chlorine).
Wait 2-3 minutes for contact time to kill the remaining biofilm colonies and then flush them with potable water.
Check the Elastomer O-Ring:
Take out the circular rubber O-ring seal. Look for hardening, flattening or micro-cracks.
Clean with a wipe and coat with a thin layer of food grade silicone grease (not petroleum jelly, which runs the risk of breaking down EPDM or nitrile rubber).
Cartridge Insertion:
Open the newly-packed cartridge (5 microns) without contaminating the outer surface of the filter media with dirty hands.
Make sure that it fits snugly in the bottom locator pin and center of the top head. Hand tighten the housing, using the wrench to tighten it down only to the end of the wrench’s range.
Purge and Check: Open inlet feed valve slowly to let trapped air out until water runs out without leaks.
Replacement Schedule: How Often Is Necessary?
As a general guideline, when the cartridge changes from bright white to a dark tan or chocolate brown, or flow rate from the RO faucet starts to noticeably decrease, the cartridge is at hydraulic exhaustion and needs to be replaced as soon as possible.
6. Conclusion
Sediment pre-filter on the outside of the RO system is the first line of defense for the entire system. By protecting this basic and low cost component, you ensure:
Safe pathogen free drinking water without shedding of secondary bio film.
Best hydraulic operating condition and reduced electric power consumption.
Prolonged life of high value booster pumps and semi permeable RO membranes.
Frequent hygiene and regular cartridge changes provide a gap between engineering reliability and your family’s health.
References
Ahmed, M. A., Amin, S., & Mohamed, A. A. (2023). Fouling in reverse osmosis membranes: monitoring, characterization, mitigation strategies and future directions. Heliyon, 9(4), e14908. https://doi.org/10.1016/j.heliyon.2023.e14908 Cited by: 293
Peña, N., Gallego, S., del Vigo, F., & Chesters, S. P. (2013). Evaluating impact of fouling on reverse osmosis membranes performance. Desalination and Water Treatment, 51(4-6), 958–968. https://doi.org/10.1080/19443994.2012.699509 Cited by: 132